Thursday, 27 February 2014

Burns - How To

To create a realistic burn makeup you will need the following products:
     
  • Latex
  • Tissues
  • Spirit Gum
  • Greasepaints/bruise wheel
  • Gelatine
  • Hairdryer
  • Makeup brushes
 
Before you begin you will need to check that your model is not allergic to any of the products, once this test has been done you can clean the area you will be working on.
 
  • Start by roughly ripping up pieces of tissue paper and using spirit gum glue them to the desired area, it doesnt have to be need or completley flat as it will give more of a realistic effect once painted
  • Dry it with a hairdryer to speed up the process if neccesary and add more tissue where needed
  • Now you can heat up your gelatine, do this by putting it into a bowl with cold water and putting it in the microwave for 60 seconds, check the temperature on your wrist before putting onto your model
  • One the gelatine is in place and dry you can paint over it to give it some dimension and colour
  • To finish off you can use puss to make it even more realistic!


Tuesday, 25 February 2014

Practice - Miss Havisham

After testing out my hair design for my Miss Havisham character I tried it on my model before the final assessment. I'll be honest it turned out totally different to how it was on my dolls head and I wasn't too pleased with the results. Terri-anne has lots of layers and a short fringe which made it difficult to blend into the rest of the hair but on reflection I think that it gives the style a lot more texture and it's not as structured as when I used the dolls head. 
I wanted to keep the makeup quite simple so went with a pale base and added bags under the eyes, I love how this turned out and think she looks really withdrawn and sleep deprived.   
I wanted to create a dryness to the lips so I did this using duo glue all over the lips using my finger to dab it on then asked my model to put her lips together when tacky to pull it apart. 
The final thing I did was to brush the eyebrows upwards using a small amount of the foundation left on my hand with a mascara wand, I think it looks naturally grey rather than if I had used a grey hair spray.
For my assessment I'd like to make the wrinkles in the face more obvious as they haven't come out on camera clear enough, other than that I'm happy with my design. 

Monday, 24 February 2014

Miss Havisham Face Charts

I came up with two different ideas for my Miss Havisham character. I wanted to have very different options so with one i tried a younger woman and the other an older woman. As much as i like the first face chart i think i want to do an older character to stray away from it looking too pretty.


Young Miss Havisham


Old Miss Havisham


Sunday, 23 February 2014

Cuts & scratches - How to

Creating small cuts and scratches is easier than you may think and you need minimal products to do it.
 
The products you will need:
 
  • Collodium
  • Tuplast
  • Fixer Spray
  • Derma Shield
  • Grease paints/bruise wheel
In our practical session we created cuts on the lip, start by applying derma shield to the area desired to protect the skin from the collodium as it is very alcoholic.

Apply the collodum to the area where you want the cut to be, work fast as it drys quick! Squeeze the lip together to create a deep cut appearance like in the image below.
 
 
Blow it with a cool hair dryer to dry it and then its ready for makeup! I used a mixture of colour from the Kryolan bruise wheel to get the results for my cut.


Next we did scratches, this was very simple to do! Apply lines of tuplast where you want the marks to be, you can use a small amount of powder on a cotton pad to take the shine away and flatten it out.
 
 
 You only need to use a small amount of color on top of this and dab at it with your finger to blend and make it look less harsh, if you want it to look fresh just add blood!
 

Thursday, 20 February 2014

Estella hair inspiration

Unlike Miss Havisham, i imagine Estella to be very glamorous and well groomed. I see long hair with curls, a lot of height and embellished accessories. I searched through pinterest and found a few really beautiful hairstyles that i think would be perfect for her character.


Hair trial

 I have been researching victorian hairstyles for my Miss Havisham character and came across the Pompadour which was a popular hairstyle for a Gibson Girl. I thought it would be a simple style to do and quite easy to adjust to make it a messy and decayed look. The image below is where i found inspiration from.


My first attempt wasnt so succesful as it didnt flow so the next time i made a clean parting from one ear to the other and made and another from underneath the ears and used the middle section to make a high ponytail on the head.
 
I then backcombed the remaining hair and bit by bit added it to the middle and secured with grips, sure enough what i ended up with was a bundle of messy hair on top of the head but it was easy to play around with it to create this messy bun shape. Im happy with the style and think with a few accessories it could look really interesting.  


Feverish look - How To

To create this look you will need the following products:


  • Moisturizer
  • Greasepaint's
  • Black stipple sponge
  • Brushes
  • Duo glue
  • Glycerine
  • Water spray
  • Pipette
  • Start by working in a generous amount of moisturizer into this skin, this will make it easier to blend later on
  • Make the face look gaunt by applying brown greasepaint, don't be afraid to really work in the product with your fingers
  • Apply red around the lash lines to make the eyes look tired
  • You can also dab red onto the cheeks, forehead, nose and chin using a stipple sponge to make the skin look flushed
  • Blend a small amount of a darker color onto the lips, this will make them appear dry and sore
  • Duo glue is also great to create this effect, just wait for it to become tacky then you can move it around the lips with a cotton bud this will also make the lips look cracked and if you like apply more color on top
  •  Focusing on the forehead, cheeks and upper lip apply glycerine, this will give the effect of sweat. You can also emphasize this effect by lightly spraying water onto the face and around the hairline
  • Take a pipette and drop a small amount of glycerine under the eye to look like a tear drop

Wednesday, 19 February 2014

A touch on Victorian hair

It was popular in the Victorian times for women to pile the hair at the back of the head mostly with curls, plaits and in a centre parting. It's also common for the front pieces of the hair to almost hang and attach to the back of the head.


Another style which is known as the "Marcel Wave" was introduced when hot irons begun to be used. The hot irons created a loose and wavy effect to the hair which would be made into an up-do. The irons could also be used to crimp wispy pieces of hair around the front of the face, almost like a fringe.


At the begining of the 20th century the "Gibson Girl" was born. These women were seen as graceful and effortless and often sport different types of buns and chignons.


Monday, 17 February 2014

Cuts & bruises - How to

Today we were taught how to creating bruising and small cuts using makeup. It's important to have pictures to refer to in order to make it look as realistic as possible. 

First decide on the age of the bruise, the fresher the bruise the darker the colours will be and as it ages it will turn more of a yellowish colour. 


All you will need to create this is a bruise wheel (you can get these at Charles fox) and a stippling sponge. 


  • Start with a clean base as usual but do not powder the area as you will be using grease based products
  • Start with the main colour of the bruise, we did slightly older bruises in our practical session so we used yellow first
  • Dab it around the area using the sponge and your finger to get a blended effect, it's always best to start off with small amounts and add to it where necessary
  • We then moved on to a purple/reddish colour to create more of a realistic bruised look, keep adding and dabbing on colours where you feel needs it until you are satisfied!

To create a small cut you need wax, grease paints/bruise wheel, blood and a spatula. 

  • As always start with a clean base and no powder as you will be using grease for this too
  • You will need to really warm up the wax on the back of your hand before you put it onto the desired area, it will be easier to apply this way!
  • Using a spatula put the wax onto the area, you will want it slightly raised in the centre and the edges should be smooth and blended into the skin
  • Once your happy with that you can make a slit through the wax, this will be your cut
  • Carefully dab foundation over the wax to disguise it into the skin 
  • You can now use your grease paints or bruise wheel to fill in the cut, use some fake blood to make it look even more realistic! 

Tuesday, 11 February 2014

Creating silhouettes

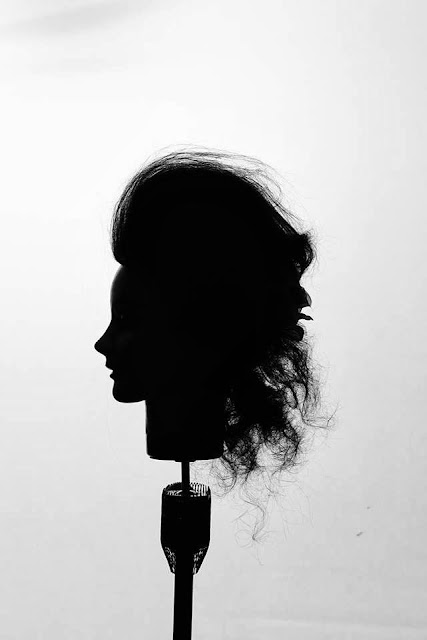
We have been looking at silhouettes on Pinterest for inspiration to create hairstyles that we will then photograph as a silhouette ourselves. The aim was to create a French Pleat that we learnt in our previous hair practical and give it a Victorian twist.

I wanted to concentrate on making mine quite high and shapely on the top and keeping the classic pleat at the back. I also left some hair come down at the back and curled it to give it more of a period feel.
I was pleased with the end results and once I had photographed it I messed it up and back combed the curls to make it look decaying.

The first image below was my first attempt, I then adjusted the front of the hair slightly at the front so it was higher and sitting more forward on the head as you will see in the second image. The final picture is my decayed hairstyle. 

I LOVED this task and it has really helped me to gain techniques and a lot of inspiration for my final Miss Havisham design.


French pleats with a twist

Using the same words that i talked about in a previous post we were asked to create a French Pleat with a twist based on those words.
 
The first hairstyle i did was for the word Eccentric...
 
All i did for this way simply make the top of the hair bigger and exagerated, i did this using the end of my pintail comb and lightly brushing back any hair into place with a back combing brush.


The next look i created was for the word Romantic...
 
I added a flower to the back of the head just by the pleat to give it a softer look and also pulled out hair from the front which i curled to make it more feminine.


The final word was cruel...
 
I re-did the french pleat but missed out the back combing stage and make it quite sleek and flat to the head, i imagine a cruel woman to have this type of neat hairstyle.